Deaf Travel10th January 2016
Deaf visit to Iceland to take in the Northern Lights
A wonderful visual experience, some of the tours were top notch experiences
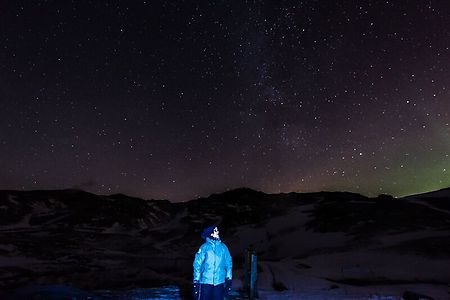
The Northern Lights or Aurora Borealis is a stunning natural phenomenon formed by charged particles from the sun interacting with the earth’s magnetic field. The lights are usually visible across a large oval around the North Pole called the aurora belt and is visible for approximately two thirds of the year. When the solar wind is especially strong, the lights can be seen further south, and the strength is measured along the Kp index with 0 being minimum and 9 being extremely strong. The intensity of solar flares reaching earth over the last year or two have seen such strong Northern Lights that they have been visible across Scotland, and further south in parts of Wales and England which is unusual. A reduction in solar activity means that the lights will probably not be this strong for another decade.
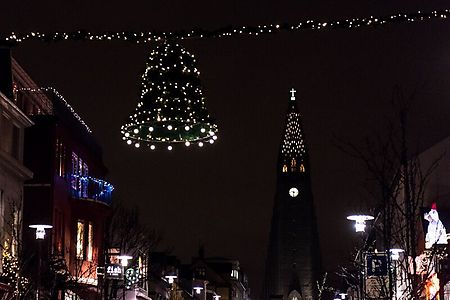
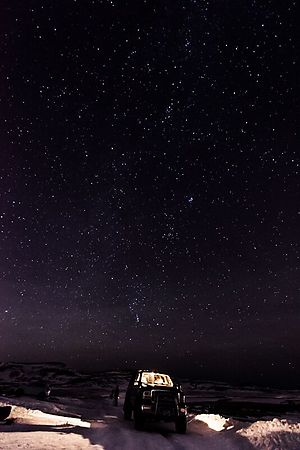 As a photographer, if I ever needed an excuse to go to Iceland, that was it! To capture the Northern lights and detailed star filled skies, is a photographer’s dream. Since Iceland sits just outside the Arctic circle it has very short days in winter and very long days in summer. In December, there are about 4 hours of daylight, which sounds awful, but actually isn’t too bad at all. The colour and quality of the daylight, plus the abundance of elegant Christmas lights, more than makes up for the darkness. One bonus is that the long winter nights provide great opportunities to see the Northern Lights if you get a little bit lucky with the weather too.
There are a number of ways to check the forecast for the possibility of seeing the lights - some websites are listed below. You generally need some solar activity and partly clear skies. Having some moonlight can be helpful for lighting the landscape slightly, creating an interesting composition that includes the scenery as well as the sky. There are a number of elements that come together to create the elusive perfect shot.
Top tip: It is always advisable to book a Northern Lights tour for your first night in Iceland because if the lights don’t show, you can usually re-book for the next night.
Since we were arriving on a very early flight, we decided to book the Northern Lights tour for our second night and also later in the week as part of another tour. However, checking the forecast and realising that the first night was likely to be the most promising, we then booked another for our first night.
It was really interesting to compare the experiences of different tours. Although my sister joined me, I didn’t want to have to rely on her in order to get the best out of any tour that we were on. There are many companies and many types of tour to see the Northern Lights. We decided that we didn’t want to go on a big coach tour because, even with my cochlear implant, I wouldn’t hear what was going on and there also wouldn’t be enough time or flexibility for me to set my camera up to get good shots of the sky if I was in a large group of people.
Our first tour was a private vehicle hire with a guide from Extreme Iceland. Although this was more expensive than all other options, it proved to be good value. We were picked up in a big jeep and were able to chat to the guide from the back seat. He introduced us to the landmarks we were passing on the way out of Reykjavik and it was enjoyable to chat to him about Iceland’s history and culture.
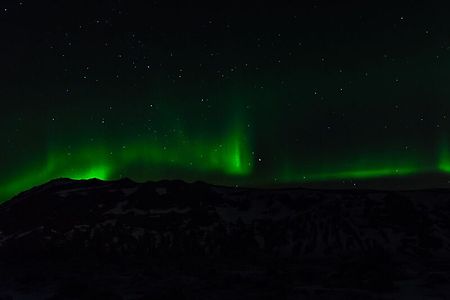
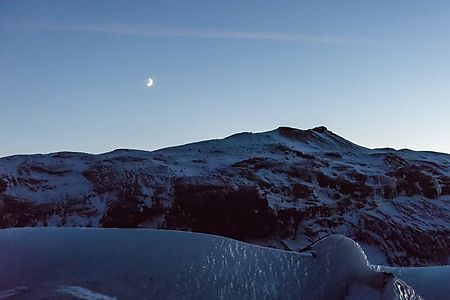 The lights were not looking very promising, but he drove us quite some distance out of the city, across the lava fields and well away from any light pollution. When we finally stopped and I stepped out of the car, the sky took my breath away and the lights weren’t even showing. In the pitch black (there was no moon) the density of the stars was incredible. Our guide talked about how there is a flickering behind the stars, in the fabric of the sky, which indicates that there is some solar activity going on. Checking the aurora map, he continued driving towards the areas that looked promising. Stopping by some hot springs we saw the lights, a very weak green glow in the distance, but not quite what we were hoping for. We moved on, after midnight stopping at another location near the mountains. Just as we were about to come back in from the snow with frozen fingers and toes, the lights flickered into action, rippling and glowing across the sky. The chill forgotten, I repositioned my camera and tripod and managed to capture the beauty of the lights against the silhouette of the mountains. It was fabulous. Our guide finally dropped us back at our accommodation sometime after 2am, that’s amazing customer service!
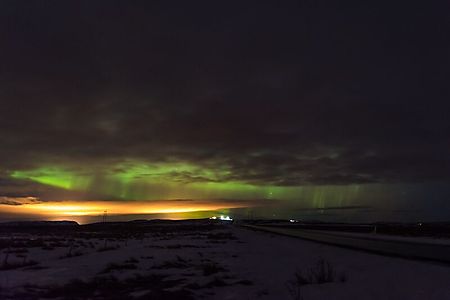
It was following this that we went on a tour with Superjeep, which proved to be less than satisfactory. We were picked up in the city, sharing a jeep with four other people. Unfortunately, I was crammed in at the back where I had no sight of the driver and couldn’t lip read. Although he wore a microphone, it was incredibly loud and distorted and I couldn’t understand anything he said. I didn’t feel able to ask to move to the front since other people had also paid for the tour and didn’t seem too willing to move. Perhaps this was my own fault for not explaining when booking that I was deaf. We were left waiting at a meeting point outside the city whilst a number of other jeeps caught up with us to ride in convoy, which we hadn’t expected. We had checked the forecast and it looked very unlikely that there would be any lights since it was so cloudy. Asking the guide about this, he dodged the question. Basically, we were driven around to probably pre-determined locations, there didn’t seem to be any effort to find the lights, nor did we escape light pollution from small towns in the area. We stopped once more to be given hot chocolate and vodka and then we were brought back to Reykjavik.
Superjeep’s website say they will rebook the tour if you don’t see the lights but we were given no information on how to do this and frankly, nor did we want to go with them again. If the lights had shown, the poor experience wouldn’t have mattered so much, but in fairness, when we asked for a refund, it was given to us.
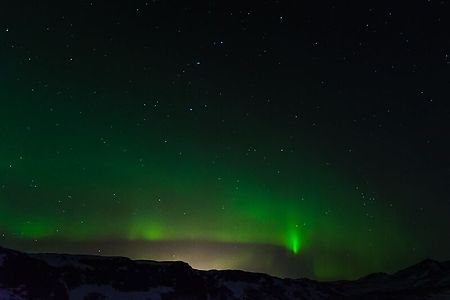
 Our last tour with Icelandic Mountain Guides was a combination of a glacier walk with a traditional Icelandic evening meal, followed by the Northern Lights tour. This was amazingly good value and a brilliant experience from start to finish. We were picked up and dropped off at our accommodation by minibus and there were eight of us on the bus. We had plenty of space here, unlike being on the jeep. I found this tour through the blog IHeartReykjavik.net which is fabulous and well worth spending time on to find out all about Icelandic culture and what to do when you visit. We had a really knowledgeable and enthusiastic tour guide and the good fortune of a cheerful, sociable mix of people on the tour. I was able to sit where I could lipread the guide, and he also wore a microphone which was quite clear and fairly easy for me to follow. My concentration did wear out after a while but I picked up a lot nonetheless. Icelandic people are very passionate about the history, culture and landscape of Iceland which makes for engaging discussions. The glacier hike was robust exercise and a truly wonderful experience in itself. After dinner, we were given a presentation about how the lights are formed and our guide was open with us that as it was cloudy the chances of seeing the lights in their full glory was low. As predicted, the lights were fairly elusive but we did see them, albeit behind partial cloud cover. There was a real sense that the guide did his best to seek out good spots to see the lights and the photographers in the group didn’t miss out.
 All in all, I’d recommend smallest group sizes if your budget allows for it. If you have the energy to be out all day until late to see the lights, combination tours are the best value, especially if you are travelling alone or in a pair. For families or groups, booking tours that charge by the vehicle will be a good option too to spread costs.
If you have access or communication requirements or you want to spend time on photography then the flexibility of small group tours will best meet your needs. IHeartReykjavik have wheelchair accessible vehicles as well as excellent guides and are the best value for money. Watch out for jeeps; they are very cool but tricky to climb in and out of!
Whatever you choose to do in Iceland, provided you aren’t wiped out by blizzards, you cannot fail to be impressed with the landscape and skies. I fell in love with the country and can’t wait to go back!
Summary:
Extreme Iceland - £310 per vehicle (up to 4 ppl) VFM 4/5 Experience 5/5
Superjeep - £101 each VFM 2/5 Experience 2/5
Icelandic Mountain Guides - £165 each VFM 5/5 Experience 5/5
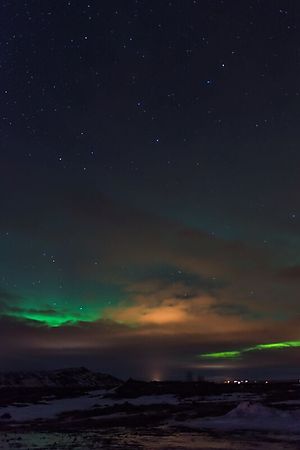
Techie Top Tips for photographing the Northern Lights
You will need:
A DSLR camera with reasonable low light capabilities i.e. able to go to ISO 1600 without too much noise
A wide angle lens with a wide aperture, preferably wider than f/5.6
Shutter release cable or remote, or use on timer to avoid camera shake
A little torch, preferably with a red light to avoid burning your eyes whilst you change settings
A sturdy tripod with a ballhead
Spare batteries - keep these in an inside pocket. Batteries drain quickly in extreme cold
Liner gloves plus ski gloves
Warm clothes, lots of layers!
Get your aurora and cloud cover forecast to predict the best areas for seeing the lights:
http://en.vedur.is/weather/forecasts/aurora/
http://www.aurora-service.eu/aurora-forecast/
http://www.swpc.noaa.gov/communities/space-weather-enthusiasts
Settings:
Play around with this a bit to get it right but to keep the lights and stars sharp, avoid having too long a shutter speed.
1. Set your lens to infinity (you may need to do this manually since autofocus doesn’t work in the dark unless you can find a bright star to focus on using the live view function).
2. Set the aperture wide i.e. a low f/number such as f/2.8 or f/1.4 if your lens can go that low.
3. Attach the camera to your tripod and attach the shutter release cable if you have one.
4. Set ISO to 1600 or higher if your camera can achieve this and shoot in RAW.
5. To keep stars sharp, use the 500 rule to work out the maximum shutter speed before you start to see blur from star trails. This is 500 divided by the focal length of your lens e.g. 500/24mm = 21s - this varies depending on the crop factor of your camera sensor. Google the 500 rule for more info.
6. Find a location free from light pollution and look for interesting foreground features such as trees, mountains or lakes to add interest to your composition.
7. Take a test shot and check the image and histogram and alter settings until you are happy with how it looks!
Article by Natasha Hirst, Deaf Writer
posted in Deaf Lifestyle / Deaf Travel
10th January 2016


